DIY Solid Car Paint Touch-Up Tips: Fixing Scratches & Chips
Maintaining the pristine appearance of your car can be a challenging task, especially when scratches and chips mar the smooth surface of your vehicle’s paint job. However, fear not, as with the right tools and techniques, you can perform Car Paint Touch-Up to restore your car’s aesthetic appeal. In this article, we’ll explore step-by-step tips to help you fix scratches and chips on your car’s paint surface, saving you money and preserving your vehicle’s visual appeal.
Materials Needed
Touch-up Paint Kit
Purchase a touch-up paint kit that matches your car’s colour code. You can find this code in your vehicle’s documentation or on the inside of the driver’s side door frame.
Primer
A high-quality automotive primer will help ensure better adhesion and longevity of the touch-up paint.
Clear Coat
Invest in a clear coat to protect the touch-up paint and provide a glossy finish. Make sure it’s compatible with the touch-up paint you’ve chosen.
Fine-grit Sandpaper
Use sandpaper with grits like 600 or higher to smooth the surface of the damaged area.
Microfiber Cloth
Clean the affected area before applying the touch-up paint.
Masking Tape
Use masking tape to protect the surrounding area from accidental paint application.
Touch-up Brushes or Applicators
Small, precise brushes or applicators will help you apply the paint evenly.
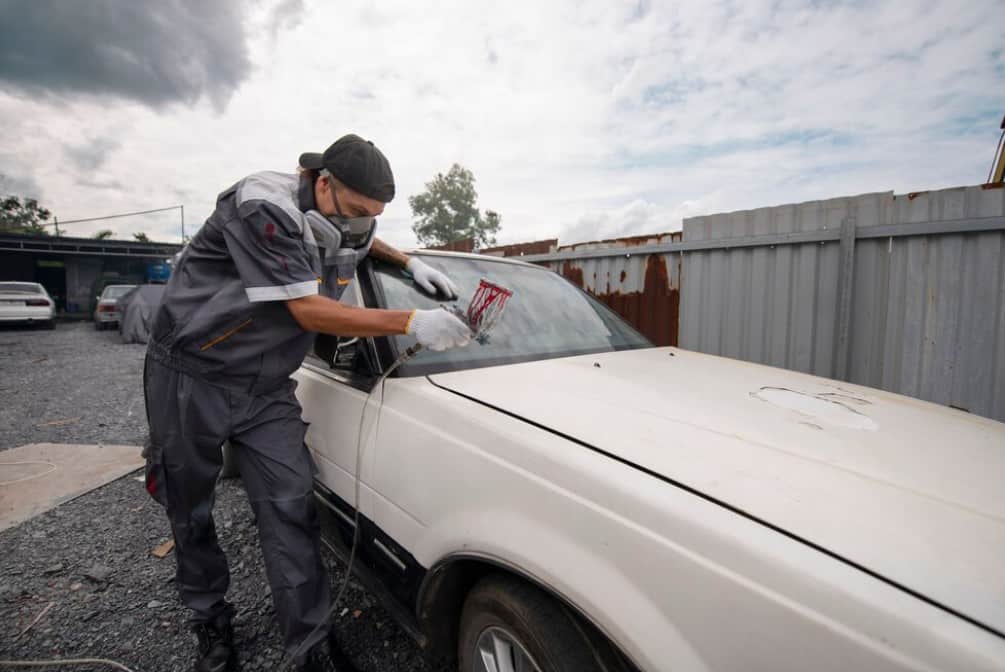
Step-by-Step Guide
Clean the Area
Start by cleaning the scratched or chipped area with mild soap and water. Dry it thoroughly using a microfiber cloth.
Sand the Area
Gently sand the damaged area with fine-grit sandpaper to create a smooth surface for the paint to adhere. Be careful not to sand beyond the damaged spot.
Apply Primer
Apply a thin layer of automotive primer to the sanded area. Allow it to dry completely, as per the product’s instructions.
Shake the Touch-up Paint
Shake the touch-up paint vigorously to ensure uniform consistency.
Apply Touch-up Paint
Using the small brushes or applicators provided in the kit, carefully apply the touch-up paint to the damaged area. Start with a thin layer, allowing it to dry before applying additional coats. Multiple thin coats are preferable to one thick coat.
Allow Drying Time
Follow the drying time recommended on the touch-up paint kit before proceeding to the next step.
Apply a clear coat.
Once the touch-up paint has dried, apply a clear coat to protect the repair and provide a glossy finish. Allow it to dry thoroughly.
Final Touch
After the clear coat is dry, inspect the repaired area. If necessary, use a polishing compound to blend the touch-up paint with the surrounding paint, providing a seamless finish.
FAQs on DIY Solid Car Paint Touch-Up: Fixing Scratches and Chips
1. How do I find my car’s colour code for the touch-up paint?
The colour code for your car is often located in the vehicle’s documentation or on the inside of the driver’s side door frame. It may also be on the firewall or in the engine compartment.
2. Can I use any touch-up paint for my car, or does it have to be specific to the manufacturer?
It’s crucial to use touch-up paint that matches your car’s colour code precisely. Automotive stores and online suppliers offer touch-up paint kits tailored to specific car makes and models.
3. Is it necessary to use a primer before applying the touch-up paint?
Yes, using a primer is recommended as it enhances the adhesion of the touch-up paint, ensuring a more durable and long-lasting repair.
4. How long should I wait between applying coats of touch-up paint?
Follow the drying time mentioned in the instructions provided with your touch-up paint kit. Typically, it’s advisable to wait at least 10–15 minutes between coats.
5. Can I apply touch-up paint in cold or hot weather?
It’s best to apply touch-up paint at moderate temperatures. Extremely cold or hot weather can affect the drying time and overall quality of the repair. Aim for temperatures between 50°F and 90°F (10°C to 32°C).
6. What should I do if the touch-up paint doesn’t perfectly match my car’s colour?
Some colour variation may occur, but if it’s significant, you might want to consult with a professional auto body shop. They may be able to provide a more accurate colour match or custom mixing.
7. Can I wash my car after completing the touch-up process?
It’s advisable to wait at least a week before washing your car after applying touch-up paint. This allows sufficient time for the paint to cure and ensures a durable finish.
8. How do I maintain the repaired area in the long term?
Regularly wash and wax your car to protect the repaired area and maintain the overall paint quality. Avoid using abrasive cleaners or tools that may damage the touch-up paint.
9. Can I use touch-up paint on larger areas of damage, such as deep scratches or dents?
Touch-up paint is best suited for smaller scratches and chips. For larger areas of damage, it’s recommended to seek professional help to achieve a more comprehensive and seamless repair.
10. What if I make a mistake during the touch-up process?
If you make a mistake, act quickly. Use a small amount of automotive lacquer thinner on a cloth to remove the fresh paint. However, avoid using excessive thinner, as it can damage the surrounding paint. If the mistake is significant, consider seeking professional assistance.
Be Aware
- Risk of Further Damage: Without proper experience and knowledge, attempting DIY repairs can worsen existing scratches or cause new damage. Applying paint incorrectly can lead to uneven finishes, blemishes, or even paint runs.
- Incorrect Color Match: Matching your car’s paint color perfectly can be tricky, especially for metallic or multi-coat finishes. Mismatched paint can be very noticeable and detract from the car’s appearance.
- Improper Surface Preparation: Proper surface preparation is crucial for a successful repair. Professionals know how to clean, scuff, and prime the area for optimal paint adhesion. Skipping these steps can lead to peeling or cracking paint later.
- Lack of Professional Tools: Professional body shops have access to specialized tools and equipment like spray guns, polishers, and drying lamps. These tools ensure a smooth, professional finish that’s difficult to achieve with basic DIY supplies.
- Time Commitment: While DIY repairs might seem quick and easy at first, the learning curve and potential for mistakes can extend the time it takes to fix the scratch properly. Professionals can often complete repairs much faster and more efficiently.
- Hidden Damage: Scratches can sometimes be deeper than they appear, revealing underlying damage like dents or rust. Professionals can assess the full extent of the damage and recommend the best course of action.
- Warranty Concerns: DIY repairs can void your car’s warranty on paintwork. Professional repairs typically come with a warranty, providing peace of mind and protection against future issues.
How can we help?
Bodyteq is your one-stop shop for all things car body repair and servicing in London. We offer a variety of services to keep your car looking its best and running smoothly, including accident repairs (both major and minor), regular health checks, pre-MOT inspections, servicing and maintenance, and complex mechanical and electronic repairs. We focus on high-quality repairs, customer satisfaction, competitive prices, and convenience. If you have any more questions about our services, you can contact Bodyteq via phone, email, or our online contact form.
Conclusion
By following these DIY solid car paint touch-up tips, you can effectively repair scratches and chips on your vehicle’s paint surface, restoring its appearance and protecting it from further damage. Remember to take your time, follow the instructions on the products you use, and enjoy the satisfaction of a well-executed DIY car paint touch-up.