A Comprehensive Guide to DIY Car Paint Touch-Up Repairs
Owning a vehicle often comes with the inevitable challenge of maintaining its appearance. Scratches, chips, and nicks on your car’s paintwork are not only unsightly but can also lead to rust and further deterioration if left untreated. While professional body shops offer paint touch-up services, a DIY approach can save you time and money. This guide will provide you with step-by-step instructions for tackling minor car paint touch-up repairs at home.
Materials You’ll Need
- Car Paint: Obtain the exact color match from your car’s manufacturer. This information is typically found in your vehicle’s owner’s manual or on a sticker inside the driver’s side door frame.
- Clear Coat: Clear coat is a transparent layer that protects the paint and gives it a glossy finish.
- Sandpaper: Fine-grit sandpaper (around 1500-2000 grit) will be necessary for preparing the surface.
- Primer: Automotive primer helps the new paint adhere to the surface and ensures a smooth finish.
- Microfiber Cloths: Soft, lint-free cloths are essential for cleaning and wiping down the area.
- Masking Tape: Mask off the area around the damaged spot to prevent overspray.
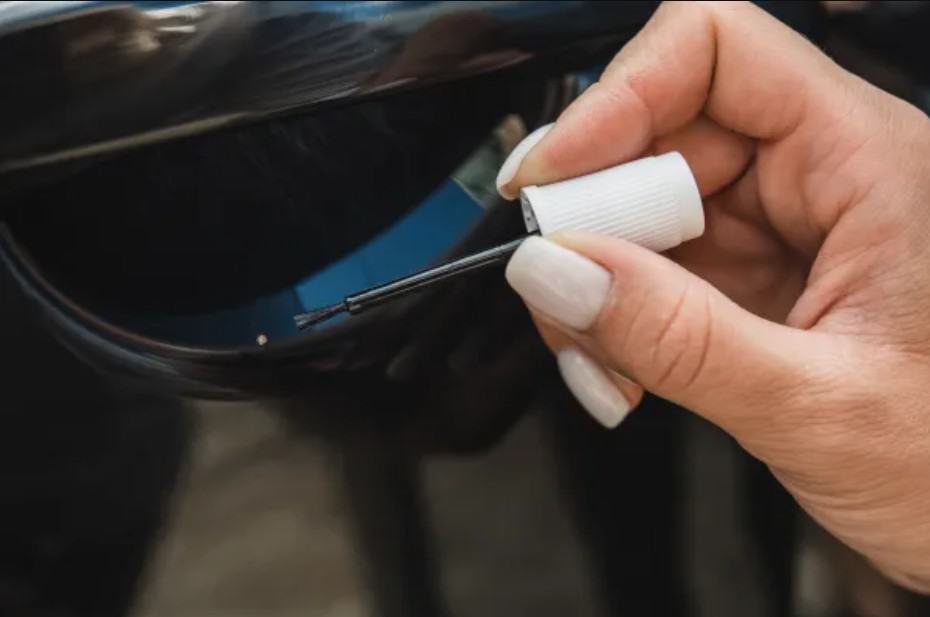
- Small Brushes: Fine-tipped brushes are useful for applying the paint precisely.
- Rubbing Compound: This helps smooth out imperfections and blend the new paint with the old.
Step-by-Step Guide
1. Clean the Area
Before you begin, clean the damaged area thoroughly. Use a gentle car wash soap and water, then dry it with a clean microfiber cloth.
2. Assess the Damage
Evaluate the severity of the damage. If the scratch or chip is deep and exposes metal, it might require more extensive repair. Superficial scratches and small chips are ideal candidates for DIY touch-ups.
3. Sand the Area
Gently sand the damaged area using fine-grit sandpaper. This step helps to smooth the edges of the scratch or chip and provides a better surface for the new paint to adhere to. After sanding, wipe away any dust with a clean cloth.
4. Apply Primer
If the scratch or chip is deep enough to expose the underlying material, apply a thin layer of automotive primer to the area. Allow it to dry according to the manufacturer’s instructions.
5. Apply Paint
Using a small brush, apply a thin layer of the car paint to the damaged area. Start with light strokes and gradually build up the layers until the color matches the surrounding paint. Allow each layer to dry before applying the next.
6. Apply Clear Coat
After the paint has dried, apply a clear coat to protect and seal the new paint. This will also give it a glossy finish that matches the rest of the car’s surface.
7. Buff and Blend
Once the clear coat has dried, gently buff the repaired area using a rubbing compound. This will help to blend the new paint with the old and smooth out any imperfections.
8. Final Cleaning
Clean the entire area around the repaired spot to ensure a uniform appearance. Remove any masking tape and wipe down the area with a microfiber cloth.
9. Wax and Polish
To complete the touch-up repair, wax and polish the entire car. This will provide an even shine and help the repaired area blend seamlessly with the rest of the paintwork.
FAQs
Q1: Can I use touch-up paint from a third-party manufacturer, or should I stick to the car manufacturer’s paint?
A1: While third-party touch-up paint can sometimes provide a close match, it’s generally recommended to use paint from the car manufacturer. They provide specific formulations that match your car’s color exactly, ensuring a seamless repair. If you do choose third-party paint, make sure to carefully compare the colour and consider reviews from others who have used the product.
Q2: How do I find the exact colour code for my car’s paint?
A2: The colour code for your car’s paint can usually be found in your vehicle’s owner’s manual or on a sticker located on the driver’s side door frame or under the hood. It’s a combination of letters and numbers that uniquely identifies your car’s colour.
Q3: Can I use touch-up paint for larger areas of damage, like a deep scratch or a bigger chip?
A3: Touch-up paint is best suited for minor scratches and small chips. For larger areas of damage, such as deep scratches that expose the primer or metal, it’s recommended to consult a professional body shop. Attempting to repair significant damage with touch-up paint might not yield satisfactory results.
Q4: How long should I wait between applying layers of touch-up paint and clear coat?
A4: Waiting times can vary based on the specific products you’re using, but generally, you should follow the manufacturer’s instructions for drying times. Typically, you’ll want to wait at least 15-30 minutes between applying layers of touch-up paint and clear coat. Make sure the previous layer is fully dry before adding another.
Q5: What if the touch-up paint doesn’t match the surrounding paint perfectly?
A5: Achieving a perfect color match can be challenging, but you can improve the blending by carefully applying thin layers of paint, allowing each layer to dry before adding more. If the color still doesn’t match, you might consider buffing and polishing the entire panel to help blend the repaired area with the rest of the paint.
Q6: Is sanding necessary for all touch-up repairs?
A6: Sanding is typically only necessary when dealing with rough or jagged edges around the scratch or chip. Sanding helps smooth the area and prepares it for the new paint to adhere better. If the damage is minimal and doesn’t have rough edges, you might be able to skip the sanding step.
Q7: Can I use touch-up paint to fix paint damage on plastic parts of the car?
A7: Touch-up paint is designed for metal surfaces. If you have paint damage on plastic parts, such as bumpers or trim, look for specialized plastic repair kits that are formulated to adhere to and work well with plastic materials.
Q8: How long should I wait before waxing and polishing the repaired area?
A8: Wait at least a day before waxing and polishing the repaired area. This allows the touch-up paint and clear coat to fully cure. Once cured, you can proceed with the waxing and polishing process to achieve a smooth and shiny finish.
Q9: Can I wash my car after completing the car paint touch-up repairs?
A9: It’s best to wait a few days before washing your car after completing a touch-up repair. This gives the paint and clear coat enough time to fully cure and harden. When you do wash your car, use a gentle car wash soap and avoid harsh scrubbing or high-pressure washing on the repaired area.
Q10: If I’m not confident in my DIY skills, should I attempt car paint touch-up repairs or seek professional help?
A10: If you’re unsure about your ability to perform touch-up repairs, especially on more visible parts of the car, it’s often better to seek professional help. A professional auto body shop can ensure a high-quality repair and a seamless color match, giving you peace of mind and a better overall result.
Conclusion
DIY car paint touch-up repairs can save you money and keep your vehicle looking its best. With the right materials and careful attention to detail, you can effectively tackle minor scratches and chips at home. Remember to follow each step diligently and take your time to achieve professional-looking results. However, for more extensive damage or if you’re uncomfortable with the process, it’s always advisable to consult a professional auto body shop.